Showing posts with label Damask. Show all posts

Monday, June 28, 2010

Damask Weddings!

I love damask! I loved it so much I used the theme in my wedding! Damask has become super popular with brides these days so Im featuring all things damask in this post! There are so many ways to incorporate damask in your wedding or event. And the great thing about it is that you can use pretty much any color as an accent and it will look great! I've seen every color from pink to red to yellow to purple to turquoise used as an accent and they all look great! Enjoy and get inspired!!

Damask origami favor boxes! Love these!! They run about $1.15 per box
Photobucket

Damask Vellum Shades...these run about $0.60 or so each and they sit right over a regular wine glass with a tea light candle in it.
Photobucket

Damask compacts...too cute! They run about $1.66 each
Photobucket
You can find the items above here

Damask mint tins
Photobucket

Damask table linens found at www.onenightrentals.com ($15 each to rent)
Photobucket

Damask Toilet tissue!! Talk about details! Imagine how awesome it would be for your guests to see damask toilet tissue in the restroom! $8.99 a roll
Photobucket
www.blissweddingsmarket.com

I found these plates at Marshalls for $3.99 & $2.99.
Photobucket

Damask square candle...$6.99 at Hobby Lobby
Photobucket

Here are some damask cakes I found online:
Photobucket
Photobucket
Photobucket
Photobucket

Friday, November 6, 2009

DIY Damask Table Runners

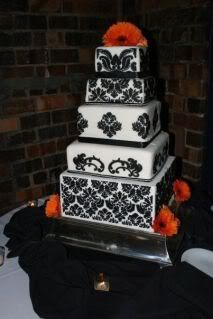
Black and white Damask is a very popular print these days especially for weddings. It's classic and pretty much any color will look good as an accent with it. I think it has a very regal vibe and Ive always loved it! If the hubby would let me, I would probably deck out our bedroom in the print but I believe as he put it, "I dont want to see another damask thing after the wedding!" LOL

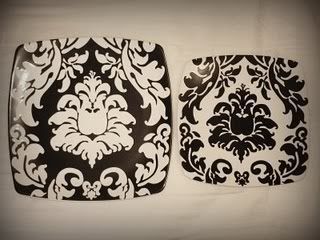
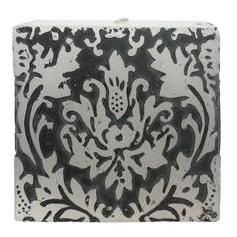
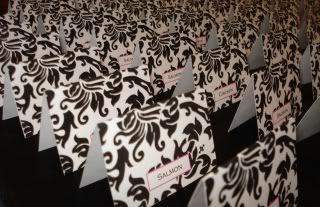
One of the other reasons I went with it as the theme for our wedding is because you see it everywhere which means it's easy to find items to use as decorations! Although, there are different variations of the print. So if you are using damask as your theme, you have to pick which one you want to go with. The version I went with is called Black Dandy Damask by Michael Miller. See below:
Photobucket
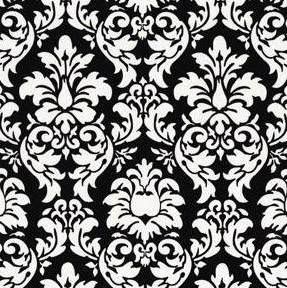
(I bought my fabric from www.craftersvision.com - only $7.20 a yard)

Initially, my original table decor involved having a damask runner on each table. I knew I wouldn't feel like making all of them though. But finding them online was like trying to find a needle in a haystack. I found one girl on Etsy.com who seems to have the Damask runner market on lock...but she never got back to me. Then I ended up changing my table decor so now all I needed was 2 or 3 runners so of course I decided to just make them myself.

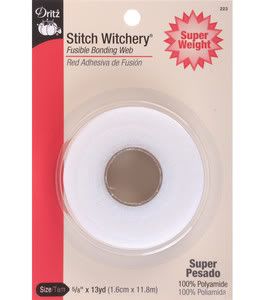
Dont worry if you dont know how to sew...this is a NO-SEW project! I cheated on this project and used the next best thing to a sewing machine....STITCH WITCHERY!! Basically, it a fusible tape used on clothing. Alot of people use it to fix hems on pants and stuff. Its the best thing since sliced bread for simple projects and its only about $2 or $3. They sell it at Walmart, Jo-Anns Fabric, or any other craft/fabric store.
Photobucket

What you need for this project:
Fabric
Iron
Ironing board
Stitch Witchery
Scissors

1. Cut the fabric to your desired length. I did mine for 6 ft tables.
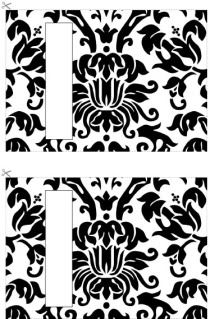
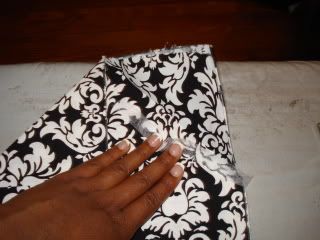
2. Fold fabric in half, making sure to fold over one sides edge. See pic below.
Photobucket
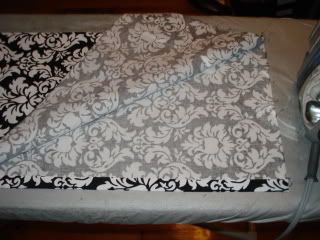
3. Use iron to press everything down. It should now look like this:
Photobucket
4. Next take your STITCH WITCHERY tape out and peel off a long piece. Lift up one side of runner and place that in between the edges of fabric, then iron down. The iron will fuse the two pieces together.
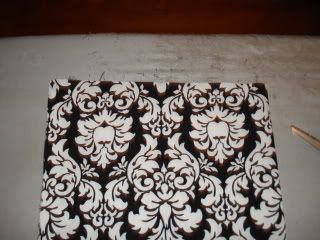
5. Almost done. Now its time to create the ends of your runner. You want to make sure they are in a nice point. Just fold fabric over to create point. Once you do that and it looks good... use your STITCH WITCHERY to fuse it down. Follow steps on both sides. See pics below.
Photobucket
Photobucket

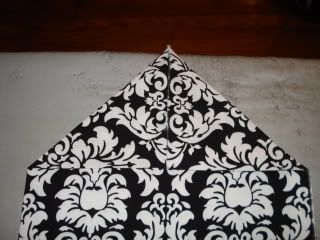
ALL DONE! How easy and quick was that?!

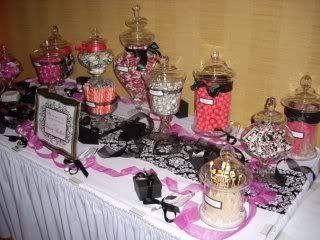
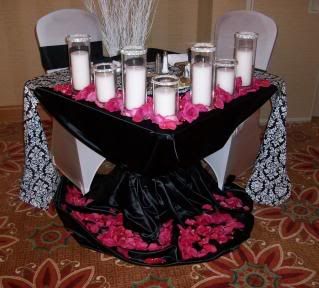
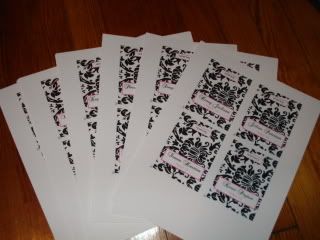
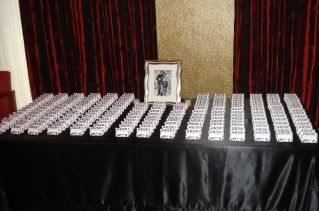
I dont have a pic of the actual runner alone but we used the runners I made on our sweetheart table and candy buffet table. Check out the pics:
Photobucket

Photobucket

Wednesday, October 28, 2009

My Damask Wedding Placecards

I went through alot of designs I wanted to use for our placecards. And since we used the Damask theme, I wanted to incorporate that into the placecards. I came across a really cute black & white template on a website (cant remember which one) and decided to go with that for placecards. I customized it a little by adding a pink border and inserted pink and black font. And I also added a box on the back of card with each person's food choice.

Once I printed them all up, I took them to Kinko's and had them cut out. It cost about $12 or so. They charge $1.49 per cut. Once they were cut, we folded them in half and whala ... all done! :)

Here is the original template:
Photobucket

BEFORE they were cut:
Photobucket

AFTER they were cut:
Photobucket

Photobucket

BACK of Placecard:
Photobucket

Email me if you want me to send you my template (nnekah@gmail.com)!

Monday, August 10, 2009

DIY Project #5 - Gift sign

Today's DIY project is super simple and cheap and can be done for any type of function...bridal showers, baby showers, or birthday parties. Its just a little something to add a touch to your gift table. Of course, the fabric and colors you choose to go with are totally up to you!

This gift sign I made will be used at my bridal shower on gift table.

Supplies: Wooden block, wooden letters, one bottle of acrylic paint, paint brush, spray paint, small beads or glitter, Tacky Glue, ribbon (optional)
Time: 45 min to 1 hr or so (if you include drying time for wooden letters)
Cost: About $10-15 (depending on what supplies you already have on hand)

Pic of some of the supplies:
Photobucket
Paint your wooden letters, let dry, then glue beads to each - let dry
Photobucket
Wrap wooden block in your fabric of choice.
Photobucket
Once letters are fully dry, glue letters to your fabric wrapped wooden block. Let dry and enjoy!
Photobucket

Monday, August 3, 2009

DIY Project #4: Card Box

Today's DIY Project is my card box. Ive come across tons of beautiful card boxes ranging from $30 to $150. The picture to the left was my original inspiration photo. My initial plan was to recreate that card box (which retails for $125). Butttt, I decided to keep it pretty simple and do a more basic one. Plus it was really super hard to find the boxes needed to recreate it.

Supplies needed: Box, scissors, fabric, ribbon, spray glue
Cost: Box $9.99 at Ikea, other supplies I already had
Time: 30 min

Im not completely satisfied with the card box yet... I think Im going to add a bow or something at top. I feel its missing something but we'll see what I have time to do. Nevertheless, here's how I did my card box for now:

1. Get box and cut slit in the lid. I used an X-Acto to cut it but a box cutter would work too.
Photobucket
2. Use spray glue to glue your fabric of choice to the bottom half of the box
Photobucket
3. Time to cover your lid
Photobucket
4. Use fabric glue to cover lid. Make sure you cut slits in fabric so you can wrap around the open slot.
Photobucket
5. Finished covering lid & bottom of box
Photobucket
6. Add some ribbon and your card sign
Photobucket
7. This is the finished product for now but again I think I may do something a little different! I will update if I make any changes!
Photobucket

Thursday, July 2, 2009

DIY Project #1 - Cupcake Stand

Today Im sharing one of my DIY projects I just did last night! As you know, cupcake towers are really popular now! There are tons of different types and styles you can buy that range anywhere from $15 to $200....but my motto is "If it can me made....try to make it!". The key to DIY projects is not having your project look "homemade"... lol. The greatest compliment to a DIY-er is for someone to think you bought what you have actually made yourself!

Since we are having a cake at my wedding, I requested cupcakes (made by my friend, Candace (http://www.suiteofsweets.blogspot.com/) for my bridal shower next month! So we needed a cupcake stand for them so of course I volunteered to make it!! I know I shouldnt be doing anything for my own bridal shower but it really does make me happy making stuff! :)

So here's the skinny on today's DIY project:
Project: Cupcake Stand
Materials needed: 3 Styrofoam discs- different sizes, Vase styrofoam (see pic below), spray glue, scissors, knife, fabric of your choice, 1 inch ribbon of your choice, clear tacky glue, rhinestone trim (Most items can be purchased from Michaels or any craft store)
Cost: About $30 (more if you do rhinestone trim)

Pics of some of the materials:
Photobucket

Photobucket

Check out my almost finished cupcake stand!! I ran out of rhinestones for bottom tier :(
Photobucket

I think it came out pretty cute! Let me know what you think!!
And I'll be sure to post pics when we put it in use!! ;)
Related Posts with Thumbnails