Showing posts with label Tutorials. Show all posts

Thursday, August 29, 2013

DIY Mirrored Dresser TUTORIAL


I lovveeee mirrored furniture! Every time I see something mirrored in stores, I just drool.  But most mirrored furniture can be pretty pricey. Even at Home Goods, you are usually going to pay at least $249 for most sizable pieces. So I thought there has to be a way to make my own, right? I needed 2 nightstands for my bedroom so I decide to give the Rast dresser from Ikea an overhaul!

I have two small disclaimers before we begin: I did not take enough pics as I was doing this to really give a  good visual of every step BUT this was a really easy DIY project to do so I think it will be fine. Also, its kinda hard to take great pics of mirrored furniture because you can see everything in the reflection lol. The pics don't really do the finished product justice, it looks wayyy better in person,  but you get the idea.  I didn't really think about getting back into blogging until after I was done lol. Nevertheless, here goes!

Materials Needed:
Rast 3 Drawer Dresser from Ikea - $35
3 cans of Spray paint of your choice- $12
Custom cut mirrors (from your local glass/mirror shop )- $77
Mirror/Mosaic adhesive (can be purchased where you get mirrors made) - $9
Knobs/Pulls to replace wood knobs - $9
Nailheads (optional)
Drill

Time to Complete:
1 Day project (once you have all materials in hand)

Steps
1. Assemble your RAST dresser. It takes about 30 min if that... its very easy to put together. Don't bother adding the back piece to it yet or the knobs on the drawers.

2. Measure the areas that will have mirrors on them so that would include the top of dresser, front of drawers, and sides if you choose. Don't measure from end to end... leave a little bit of room on each side so it wont be exacly the same size. This will prevent any issues with closing the drawers.  Once you have your measurements all set,  go to your local glass shop and order your mirrors.  My shop took about 2 days to do them for me. Also unless you plan to add your own holes, you have to request holes put in your mirrors as well. My place charged an extra $10 per hole.  If you want to use the measurements I took to my guys, here they are:
TOP (1): 23" X 11 1/4" (Thickness of mirror - 3/16") Top piece is thicker since you will be sitting things on it
DRAWERS (3):  22 3/4" X 7 1/8"  (Thickness of mirror - 1/8")
HOLE SIZE for drawers: 1/4" Hole in center

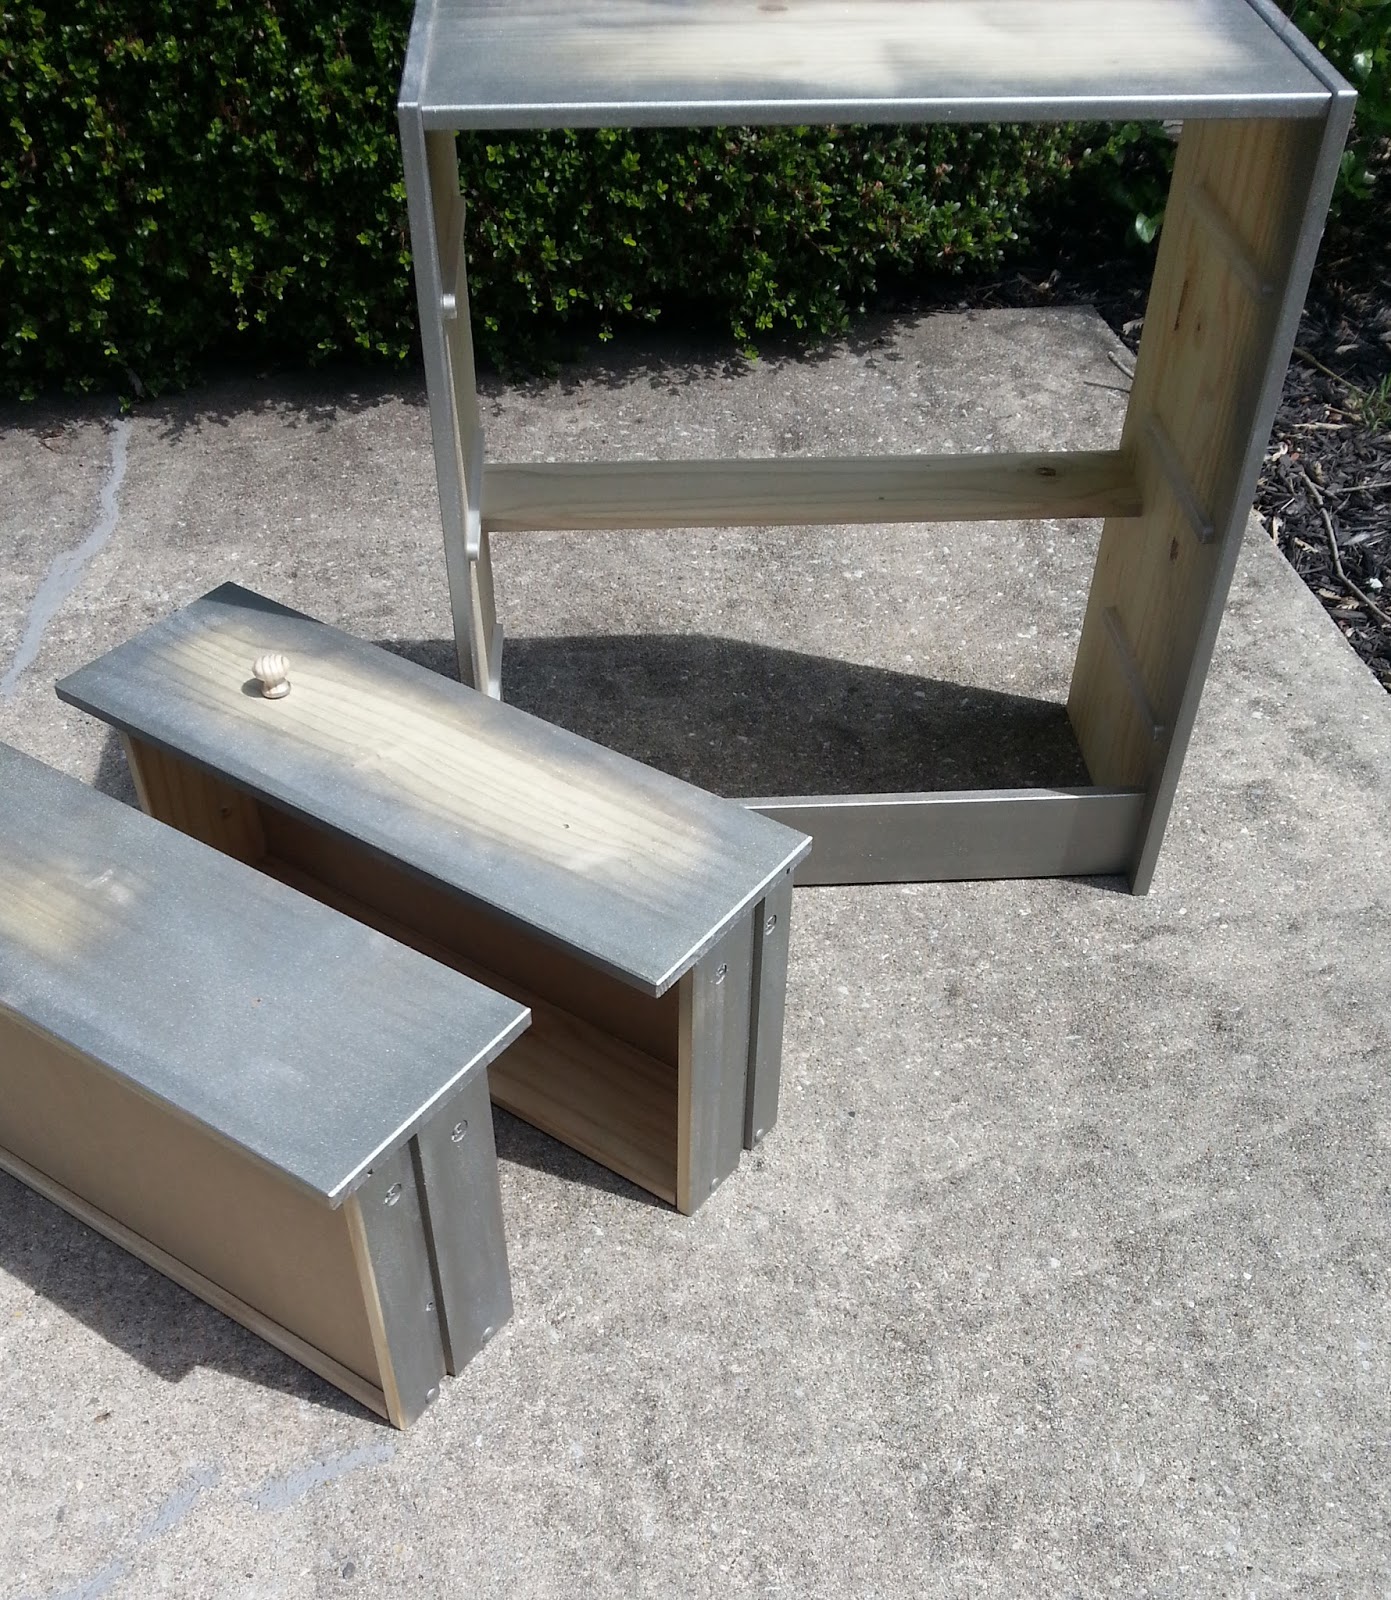
3. Once dresser is assembled, spray paint your dresser to your desired color. The wood is very porous and  it kinda soaks up the paint.  I originally bought 2 cans but ended up using 3 cans. It prob also depends on the color you go with too. I went with Rust-Oleum Silver and I found myself having to spray alot to get an even finish.  But remember you only need to paint the outer edges of the drawers. For the base of the dresser, you only need to paint the edges of the top. I cheated and did not put mirrors on the sides of the dresser so I had to fully paint that but if you choose to add mirrors to the sides, you only need to spray paint the edges of sides as well. See below:
4.  Next step is optional, I love nailheads so I decided to add them to my dresser.  You can order a roll of nailheads online. They are super easy to put on...just make sure you use a rubber mallet and not a regular hammer to put them on.  Here is how the nailheads look once I finished putting them on. 
 
5.  Now its time to take out the mirrors for your drawers, the ones with the holes.  Place the mirror over the drawer and mark on the drawer where the hole is. Remover the mirror and drill your hole.  Repeat process from the other 2 drawers.  Once thats done, its time to glue the mirrors on.
Take out your adhesive and spread over back of mirrors...but sure not to put glue too close to the edges so it won't ooze out on sides. Once you glue all the mirrors on, get a few heavy books and place them on top of them and sit to side. Normally, they suggest at least 24 hours for glue to cure but its usually cured before then. But to be on safe side, give it at least 12-24 hours to dry.

6. Once everything is dry, add your knobs or pulls onto the drawers. BUT, be sure not to make the mistake I made on one of drawers. If you twist your knob on too tight, you can crack the mirror.  I made this oops on the 2nd dresser I did so I was little bumbed but you really can't see it well unless you really look. So hopefully you don't make that mistake. See below:

7.  Once you add the knobs, put your drawers back in dresser and you're all done! Not bad for a DIY project huh? I was extremely pleased with the way they turned out!


Monday, December 5, 2011

Toy Chest Tutorial - Great Baby Shower Gift!

One great gift idea for a baby shower is a custom wood toy chest!  I decided to do one for my bf's baby shower. First thing you have to do is buy a wood toy chest.  I was surprised at the cost of them.  Unfortunately, they aren't cheap.  Depending on the size you get, real wood chests can be pricey. The one I purchased shown below is pine and its about 35 inches wide.  I got it on sale for $155 but you may be able to find one a little cheaper. I researched online and saw prices that ranged from $100 and up for the size I got but if you have to have it shipped, that could increase the cost a lot since its heavy OR if you are handy, you can build one. I would have LOVED to build one myself but clearly I'm no carpenter...lol

Next you have to removed the hinges so you can take the lid off.  Then I primed the whole box and lid.  Dont skip this step, the primer helps your paint adhere better.  As you can see, I was working on a lot of things while working on the chest lol

 I painted the box white and chose to go with a striped design on the front of  chest. I had a few other ideas in my head initially but they didn't quite work out.  So this is how it came out after painting: 

Once everything dries, attach the lid back on the chest.

 Next its time make the cushion.  First you have to purchase foam from your local fabric store. I got 2 inch thick foam for my cushion. Its about $30 a yard and I needed a yard. Luckily I had a 40% off coupon at Joanns. Next I measured the size I needed for the cushion and used an electric knife to cut it. You CAN NOT cut this foam with a pair of scissors so don't bother trying.

 Since this was my first time making this type of cushion cover, I completely forgot to take pics of how I made the cover :(  But here is how it looked once I was done! It wasn't perfect but not bad for my first time. And the great part is it can be used with or without the cushion. I also got the material for the cover from Joann's. It was $26 a yd.  And the cushion cover is removable and washable.

Lastly, time to customize with the child's name.  I painted letters and attached with a hot glue gun.

Walah!! All done! :) It takes some time to complete this project but its worth it for the outcome! Don't you agree? :)

And remember when I did this one for another one of my friends? This chest is a lot smaller. Its from Micheal's and was only $50 but again its wayyy smaller. But you can use a Michaels coupon to buy this so that's a steal!

Wednesday, March 23, 2011

Before and After: Thrift Store Chair! (And TUTORIAL)

So Im finally finished my thrift store chair re-do and I couldn't be more pleased with the outcome! It went from this old ugly chair BEFORE:

To this fabulous chair AFTER

Here is an up close view of the back of the chair.  I used silver nailhead trim around the edges to give it a more polished and funky look.  Initially I was planning on doing double welt cording, but decided I would like this look better and I'm glad I went with it.

So lets see how much this project cost me: 
Thrift Store Chair       $7.50
Spray Paint (2 cans)   $10
Fabric (1/2 yd)          $22.50
Nailhead Trim (the kit was $30--including shipping-- but I only used about $2.00 worth of it and still have alot of it left to use on other projects)
Batting ($8.00 for a bag of it but just like the Nailhead trim, I only used a little and still have alot left over for other projects so lets just say I used about $2.00 worth of it for this chair)
---------------------------------------
All together this chair cost me about $44 to paint and reupholster!  Not bad at all especially when something like this could easily run anywhere from $129 to $199 at Home Goods and even more at a high end furniture store!!

I still have to do the twin of this chair.... check them out side by side. Big difference right?


So how did I do this? Well here is my tutorial on it:
First thing you want to do is gather all your supplies: 
Chair 
Fabric
Spray Paint- I recommend Rust-Oleum Lacquer from Home Depot
Sanding paper (optional)
Staple Gun
Spray glue 
Rubber Mallet
Batting - Here is a picture of the batting I used but you can use any kind:
Purchased at Joanns
Nailhead Trim kit or some type of trim - Here is a picture of how the kit looks..it comes with the nails and trim:
Purchased online www.diyupholsterysupply.com
Next thing you want to do is remove your seat from the chair frame.  This is easy... just flip chair over and use screw driver to unscrew nails that are holding seat cushion in place.  So now your chair should look like this:
After this, you can sand down your chair a little. I didn't do this but it is good to do because it will help remove any polyurethane and dirt on chair which will help the spray paint stick better.  I plan to do a little sanding on the other chair.  

Now its time to paint! Take your chair to a well ventilated area (preferably outside) and get to painting! Your chair may need a couple of coats.  My chair used 2 cans of spray paint.
 
Now pull out your chair cushion.  If its in bad shape, you may need to add some extra batting to your cushion.  My cushion was in good condition so I was able to get away without adding anything extra.  Get your fabric and cut a piece big enough to cover the cushion. Flip fabric on opposite side and then place cushion face down. Get your staple gun out and start stapling fabric around your cushion tightly.


Once you are done, you can attach your cushion back on the chair frame (once paint has thoroughly dried).  It should look like this:
If you are happy with the outcome of your chair at this point, you are done!! BUT if not, this is where it gets a little tricky.  If you decide, as I did, that you also want to cover the back of the chair as well, this next part isn't really hard but just not quite as easy as what we just went over.  I'm sure there are tons of different ways to do this but this is how I did it.  

Measure out a piece of fabric thats big enough to cover the back of your chair. Now this part may be a little hard for me to explain so bare with me. Basically I just used some spray glue and sprayed the center of the fabric and stuck it to the back of chair. Then I used a needle and thread to sew the fabric at the top in place a little.  

Next I got my batting out and cut a piece out and repeated the spray glue step. I sprayed some glue in the center and stuck it on the back of chair under the fabric I just sewed to the chair at the top:
  Then I took scissors and cut around it to fit the area i was covering like this: 
I used a little more spray glue and stuck the fabric to the batting. Then I got my nailhead trim set out and started putting that on like this:

This trim is really cool because every 5th stud, there is a hole and thats where you put the individual nailhead. If you look closely at the pic above, you can see the hole where the nailhead goes.  

Half way done with the nailhead trim...see below:


Finally, ALL DONE! Hope my tutorial helps someone out a bit!
Related Posts with Thumbnails