Tuesday, December 29, 2009
Finally got our professional pics!
So we finally got our professional pictures back and they came out really good! The photographer did an awesome job! I just wished we had more time to get more pics of just me and Armond...we didnt have much time right after the wedding since we didnt want to keep our guests waiting a long time. I will be doing a Real Wedding feature on us soon so stay posted!
Monday, December 21, 2009
Home Decor DIY Project #2 : Bench Update
After getting married, I moved in with my hubby at his place (now our place:). So needless to say, I already had tons of stuff and so did he. I decided I wanted to jazz up an accent bench I used in my old apartment to go with the decor of our newly decorated (by me of course) living room area.
The color scheme in our living room is light blue, brown, and white/cream. As popular as that color combination is for home decor, I found it rather hard to find the material similar to what I envisioned in my head. I finally ran across some fabric on a website that I liked. I decided to recover the bench seat with this material. I used a different material to create pillows to accent it.
Here is the bench BEFORE pic (sorry its kinda dark)
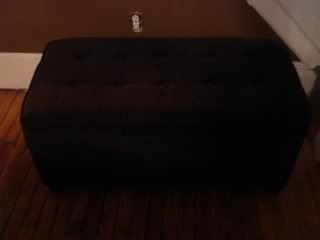
First step, turn over the bench and remove hinges connecting top piece to the base of bench
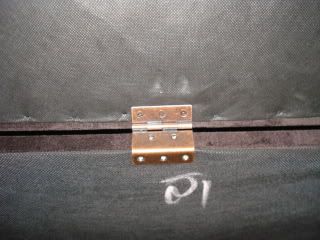
Next step, align fabric on top of bench and hand sew your new fabric to top piece. This worked out easy for me because my bench was upholstered in fabric already. However, it take a little while to do it.
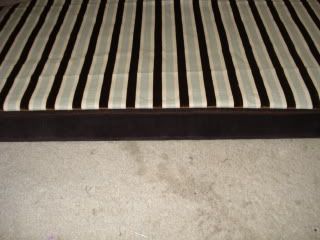
Last step, after you have sewn new fabric on, attach the top piece back to the base. Make or buy some pillows to accent it. I made these pillows.
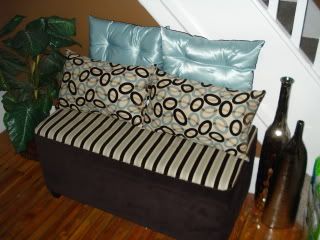
All done! :)
The color scheme in our living room is light blue, brown, and white/cream. As popular as that color combination is for home decor, I found it rather hard to find the material similar to what I envisioned in my head. I finally ran across some fabric on a website that I liked. I decided to recover the bench seat with this material. I used a different material to create pillows to accent it.
Here is the bench BEFORE pic (sorry its kinda dark)

First step, turn over the bench and remove hinges connecting top piece to the base of bench

Next step, align fabric on top of bench and hand sew your new fabric to top piece. This worked out easy for me because my bench was upholstered in fabric already. However, it take a little while to do it.

Last step, after you have sewn new fabric on, attach the top piece back to the base. Make or buy some pillows to accent it. I made these pillows.

All done! :)
Home Decor DIY Project #1 : Living Room Painting
So after looking ALL over for the perfect painting to go with the decor in my living room, I decided to paint my own picture. Now please note, I dont profess to be a real deal artist by any means but I do enjoy doing it as a hobby.
First, I had to figure out what look I was going for with the painting. Should I do something abstract, something with clean lines, something super simple... decisions, decisions. So I decided to go on www.art.com. They have tons of hot prints (unfortunately none of them worked for what I wanted) but I did come across a picture that inspired my design.
I sketched out my idea on paper first. I bought a canvas from Michaels (40% off) and sketched my design on the canvas in pencil. Next, I knew I didnt want to do a flat painting. I wanted to create a little texture so I bought some glass bead gel and a heavy gel gloss medium. These can be purchased at any art store (or Michaels).
Basically, you mix the gels in with your paint and it thickens the consistency of it allowing you to create texture in your painting.
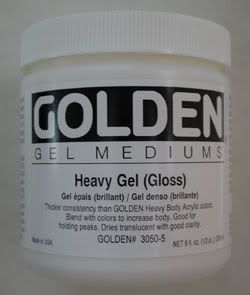
Here is what the heavy gel bottle looks like:
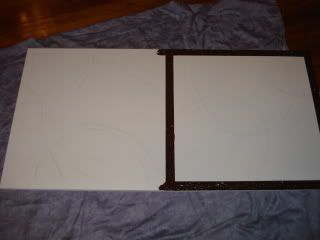
Filling in lines of sketch:
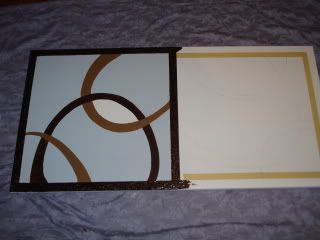
Finished up one side:
All done!
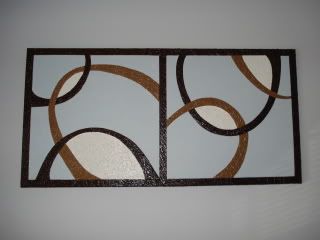
First, I had to figure out what look I was going for with the painting. Should I do something abstract, something with clean lines, something super simple... decisions, decisions. So I decided to go on www.art.com. They have tons of hot prints (unfortunately none of them worked for what I wanted) but I did come across a picture that inspired my design.
I sketched out my idea on paper first. I bought a canvas from Michaels (40% off) and sketched my design on the canvas in pencil. Next, I knew I didnt want to do a flat painting. I wanted to create a little texture so I bought some glass bead gel and a heavy gel gloss medium. These can be purchased at any art store (or Michaels).
Basically, you mix the gels in with your paint and it thickens the consistency of it allowing you to create texture in your painting.
Here is what the heavy gel bottle looks like:

Filling in lines of sketch:

Finished up one side:

All done!

Wow!
I just got a lovely email from someone who visited my blog. She just wanted to thank me for doing it and stated how much its inspired and helped her not feel so overwhelmed by the whole wedding planning process. It really touched me because I know firsthand how overwhelmed a bride can feel during that planning process. And I remember searching for hours and hours everyday for sites that would shine some light on wedding stuff I didnt have a clue about when I was planning my own. So Im glad to know that there are people out there who enjoy reading it and most of all those who can take something from it that they can use!
I know I have been missing in action lately. Been kinda busy doing DIY home projects... a few of which I will feature. So stay tuned...there will be tons of upcoming posts soon. Also, Im working on relaunching my handbag website www.nnekasaran.com. I took a break from the biz while planning my wedding but lookout in 2010...I'll be back on my grind! :)
I know I have been missing in action lately. Been kinda busy doing DIY home projects... a few of which I will feature. So stay tuned...there will be tons of upcoming posts soon. Also, Im working on relaunching my handbag website www.nnekasaran.com. I took a break from the biz while planning my wedding but lookout in 2010...I'll be back on my grind! :)
Friday, December 4, 2009
MY WEDDING DRESS - Vendor Review: JuliusBridal.com
I cant say enough great things about the place I got my wedding dress from. Julius Bridal is run by Julius and his wife and they were sooo nice to work with. I initially found out about them from my BF, Jackie. She had a friend who ordered her wedding dress online from them. When I went on the website, I noticed they had tons of dresses that were really reasonably priced but I had already put a deposit down on a dress I "thought" I liked alot. Once I looked further on the site, I realized they had a physical location in Long Island, NY. They are located inside of a full service bridal center and their showroom is beautiful! There was one dress I saw online that I was particularly in love with so that was the first one I tried on... and there was no need to try on anything else after that! I LOVED LOVED LOVED it!
And that is definitely the feeling a bride should have when choosing a gown. The first dress I put a deposit on... I liked but definitely didnt really love it. Sooo needless to say, I was so happy that I found my dream dress!
At the time I purchased it, it was only $799 !!!!!!!!!
Not to mention, the price even included alterations!
Here is a pic of the front and back of my dress from the website.
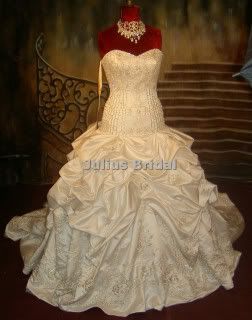
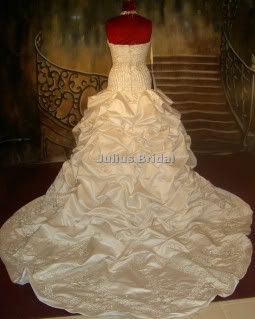
FYI: This dress is now $1399 (so I guess it went up shortly after I purchased mine) Julius did tell me this is a very popular dress.
Also, if you want to design your own dress, you can send them the sketches and they will make it for you! I would definitely recommend Julius Bridal if you are looking for a wedding gown. Im telling you, they are super great to work with. And dont be thrown off by the website. Its pretty basic, nothing over the top. But they have a large variety and very reasonable prices.
If you are in the NY area, you can check them out at:
Elegant Affairs & Bridal Center
Address: 221 Atlantic Avenue
Oceanside, NY 11572
Phone: 516-208-7620 (ask for Julius Bridal)
Monday – Tuesday – Wednesday – Fri. 11:00 A.M. till 8:00 P.M.
Thursday and Saturday -- 12:00 P.M. till 9:00 P.M.
Sunday 12:00 P.M till 6:00 P.M.
info@juliusbridal.com
If you are not in the NY area, check out the website ww.juliusbridal.com
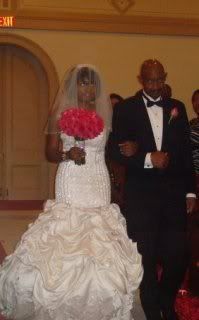
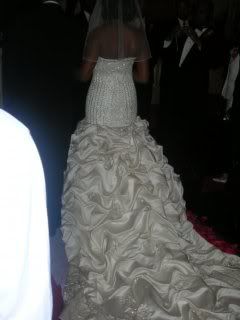
I still haven't gotten our professional pictures back yet, but here are a few pics of me wearing the actual dress! I truly loved it and got sooooo many compliments on it (even from guys) LOL
And that is definitely the feeling a bride should have when choosing a gown. The first dress I put a deposit on... I liked but definitely didnt really love it. Sooo needless to say, I was so happy that I found my dream dress!
At the time I purchased it, it was only $799 !!!!!!!!!
Not to mention, the price even included alterations!
Here is a pic of the front and back of my dress from the website.


FYI: This dress is now $1399 (so I guess it went up shortly after I purchased mine) Julius did tell me this is a very popular dress.
Also, if you want to design your own dress, you can send them the sketches and they will make it for you! I would definitely recommend Julius Bridal if you are looking for a wedding gown. Im telling you, they are super great to work with. And dont be thrown off by the website. Its pretty basic, nothing over the top. But they have a large variety and very reasonable prices.
If you are in the NY area, you can check them out at:
Elegant Affairs & Bridal Center
Address: 221 Atlantic Avenue
Oceanside, NY 11572
Phone: 516-208-7620 (ask for Julius Bridal)
Monday – Tuesday – Wednesday – Fri. 11:00 A.M. till 8:00 P.M.
Thursday and Saturday -- 12:00 P.M. till 9:00 P.M.
Sunday 12:00 P.M till 6:00 P.M.
info@juliusbridal.com
If you are not in the NY area, check out the website ww.juliusbridal.com
I still haven't gotten our professional pictures back yet, but here are a few pics of me wearing the actual dress! I truly loved it and got sooooo many compliments on it (even from guys) LOL


Still Here...
I took a little break for the holidays but I will be updating my blog soon. Ive also been doing some home projects...painting, assembling desk, etc. So Ive been a busy beaver! I may even be doing some home decor post too! :)
Hope everyone had a great Thanksgiving!
Hope everyone had a great Thanksgiving!
Friday, November 20, 2009
VENDOR REVIEW: His & Her Catering Service
Originally, we were going to do something really small for the rehearsal dinner...but we changed our minds and decided to hire a caterer for it. I contacted His & Her Catering Service because I had been to a few events they catered and thought the food was great. Shaletha, one of the owners, was absolutely great! She worked with me to pick a menu. We decided to go with a Pasta Bar so our guests had the option of spagetti and penne pasta, alfredo & marinara sauce, meatballs, sauteed shrimp, and grilled chicken. We also had toss salad, garlic bread and rolls, lemon pound cake and strawberries, and Ice Tea.
We had about 75 people at the rehearsal dinner and everyone loved the food. It was so good, we ran out! And when we ran out, they even brought more food in for us! They were there to set up on time, the staff on hand was very friendly, and they are reasonably priced. If you are in the Richmond, Va area and looking for a caterer for any event, I would definitely recommend His & Her Catering!
www.hisandhercatering.com
P.S. Sorry I dont have any pictures of the rehearsal dinner...I was SUPER exhausted the day before my wedding. Being a DIY bride has a price....lack of rest!! lol
Thursday, November 19, 2009
Real Wedding - Nicole & Roosevelt
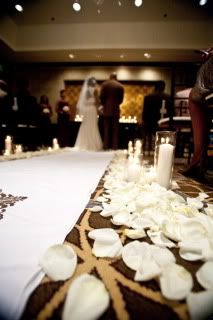
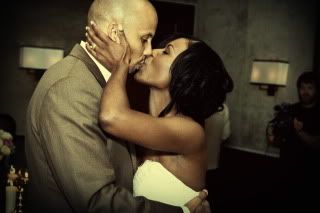
Todays real wedding feature is on Nicole & Roosevelt. Nicole and I have a mutual friend and when she shared her wedding pics with me, I thought they were great! The lovely pair met online through a professional networking group on meetup.com (which is not a dating website). Roosevelt reached out to Nicole and they went back and forth via email, chatted a couple of times, and scheduled a "date". However, Roosevelt didn't follow through so their date never happened. Fast forward a couple of months later, out of the blue Nicole hears from Roosevelt. This time they actually went out. And they have been together ever since! :)
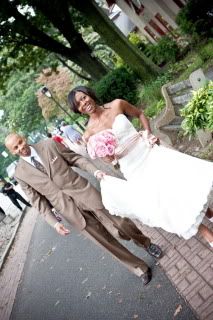
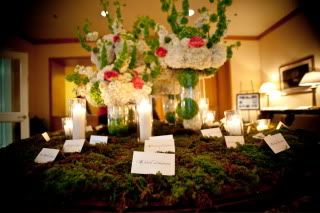
On September 12, 2009, the couple wed at the Four Seasons Hotel in Philadelphia, Pa in front of 35 guests.
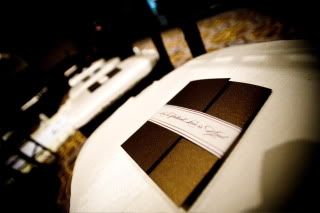
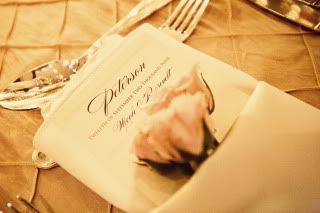
Nicole gets a gold star in the DIY Club because she took on the task of doing the menus, programs, cupcake bags, cocktail napkins, favor tags for tea tins, out of town guest tote bags, rehearsal dinner invites and rehearsal dinner menus. She did a great job on everything! Very elegant!
When asked how she knew Roosevelt was the one, she said "When we started to stay up all night talking for hours on the phone and when one day without seeing him felt like forever....thats when I knew."
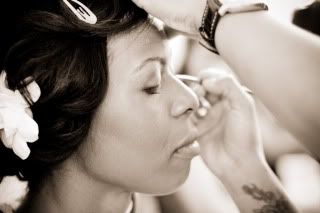
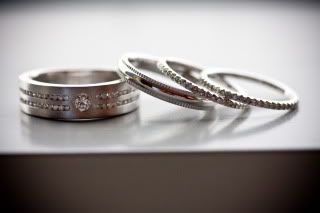
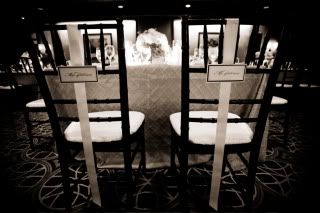
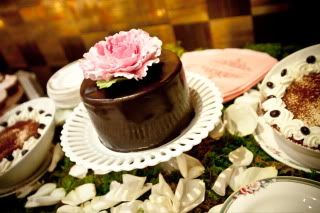
Check out some of the beautiful pictures from their big day!




A Few Miscellaneous Wedding Things.....
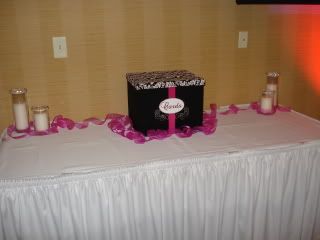
Remember the DIY Card Box I made in one of my earlier post? Well here is how we used it on the gift table at wedding:
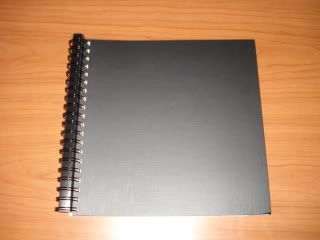
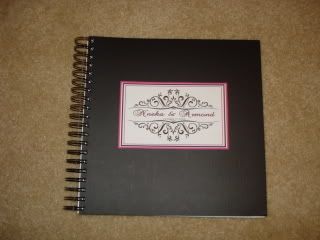
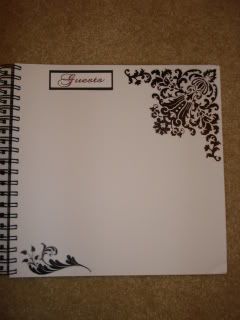
I actually had all intentions to buy a Guest Book instead of making one but I got caught up at the last minute and had to throw something together. I got this plain book from Walmart with blank pages. I created a label for the cover and bought some damask stickers from Michaels and decorated the inside pages with it. For something that virtually no one really pays attention to...it didnt come out half bad! :)
BLANK BOOK
BOOK WITH LABEL
INSIDE
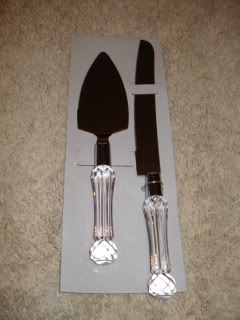
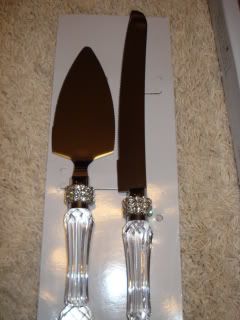
Since I had rhinestones left over from jazzing up my vases, I decided to buy a cake serving set (only $10 from Walmart) and add some pop to it! Just use your hot glue gun to glue them around the handle.
BEFORE
AFTER
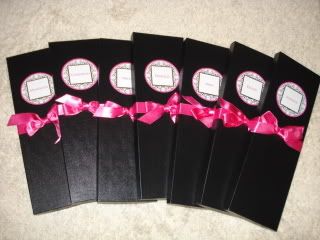
As a gift for my husband's Inner Circle/Bridal Party (I'll explain the inner circle thing later), we got all the guys pink ties for them to wear the day of wedding. I purchased the tie boxes online, then created personalized labels for each box. I topped it off with ribbon tied in a bow. Check them out!

I actually had all intentions to buy a Guest Book instead of making one but I got caught up at the last minute and had to throw something together. I got this plain book from Walmart with blank pages. I created a label for the cover and bought some damask stickers from Michaels and decorated the inside pages with it. For something that virtually no one really pays attention to...it didnt come out half bad! :)
BLANK BOOK

BOOK WITH LABEL

INSIDE

Since I had rhinestones left over from jazzing up my vases, I decided to buy a cake serving set (only $10 from Walmart) and add some pop to it! Just use your hot glue gun to glue them around the handle.
BEFORE

AFTER

As a gift for my husband's Inner Circle/Bridal Party (I'll explain the inner circle thing later), we got all the guys pink ties for them to wear the day of wedding. I purchased the tie boxes online, then created personalized labels for each box. I topped it off with ribbon tied in a bow. Check them out!

Friday, November 13, 2009
VENDOR REVIEW: Holiday Inn, Colonial Heights, VA
One of the most important steps in wedding planning is finding a venue. Needless to say, this is not a fun process at all. Depending on where you live, it may be harder for you than others. Major metropolitan areas usually have alot of venues but they may be booked far out in advance.
I contacted about 7 or 8 places and ended up going with the new Holiday Inn in Colonial Heights, Va. When I went to the Holiday Inn to check it out initially, I didn't know what to expect. I think I associated Holiday Inn to the old school, run down Holiday Inns I remember seeing around years ago. But let me tell you, the Holiday Inn has really stepped their game up! I'm not sure if this is the case for all of them but this one really surprised me. It was very nice and I loved the decor! It was especially nice to do it at this particular hotel too because the area where the ballroom is located is like a separate wing of the hotel. So hotel guests don't have to walk through your event to get to their rooms.
I worked with the event coordinator there, Vibha, who did a great job helping me get everything together! When we went to do the tasting, the chef came out and introduced himself and offered suggestions on what we should go with for our food options. And the food was great! During the weekend of the wedding, the general manager helped out alot with setting up the reception and was a pleasure to work with as well. The whole staff was friendly from the front desk clerks to the servers and bartenders at reception! We are extremely glad we chose to have our reception there and would definitely recommend it to anyone looking for a reception/event venue. We invited about 220 people so it was a little tight in the ballroom with the amount of tables we needed but we made it work.
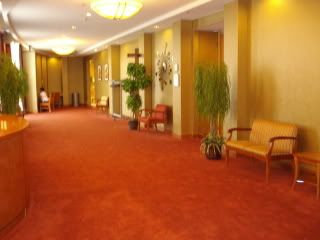
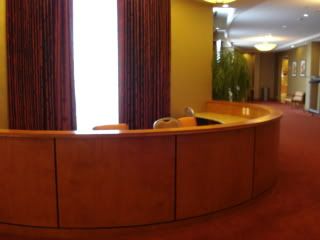
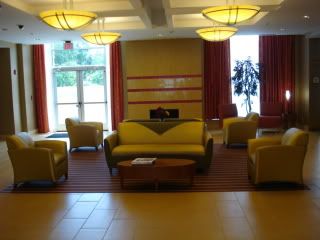
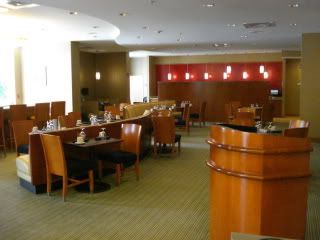
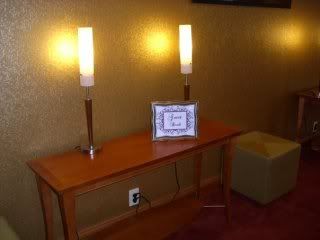
Check out some of the pics of the hotel in general. They probably don't give the hotel its full justice but you get a general idea:
Wing where ballroom is located
If you have a bar, this is the area where they set it up
Lobby
Cafe
Hallway
I contacted about 7 or 8 places and ended up going with the new Holiday Inn in Colonial Heights, Va. When I went to the Holiday Inn to check it out initially, I didn't know what to expect. I think I associated Holiday Inn to the old school, run down Holiday Inns I remember seeing around years ago. But let me tell you, the Holiday Inn has really stepped their game up! I'm not sure if this is the case for all of them but this one really surprised me. It was very nice and I loved the decor! It was especially nice to do it at this particular hotel too because the area where the ballroom is located is like a separate wing of the hotel. So hotel guests don't have to walk through your event to get to their rooms.
I worked with the event coordinator there, Vibha, who did a great job helping me get everything together! When we went to do the tasting, the chef came out and introduced himself and offered suggestions on what we should go with for our food options. And the food was great! During the weekend of the wedding, the general manager helped out alot with setting up the reception and was a pleasure to work with as well. The whole staff was friendly from the front desk clerks to the servers and bartenders at reception! We are extremely glad we chose to have our reception there and would definitely recommend it to anyone looking for a reception/event venue. We invited about 220 people so it was a little tight in the ballroom with the amount of tables we needed but we made it work.
Check out some of the pics of the hotel in general. They probably don't give the hotel its full justice but you get a general idea:
Wing where ballroom is located

If you have a bar, this is the area where they set it up

Lobby

Cafe

Hallway

Thursday, November 12, 2009
My Menu & Food Options
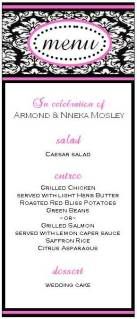
As I was coming up with the way I wanted my table settings to look, I knew I wanted to include a menu. So I created the menu using Powerpoint, printed them out on cardstock, and took them to Kinkos to get cut. Kinkos charges $1.49 per cut and it gives them a clean look.
Of course I had a few different designs I was going to go with before making a final decision. This was one of the menu designs I initially came up with:
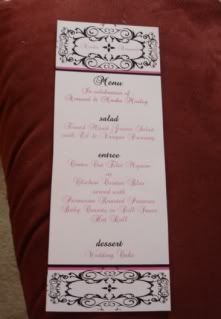
And this is the final menu design I went with:
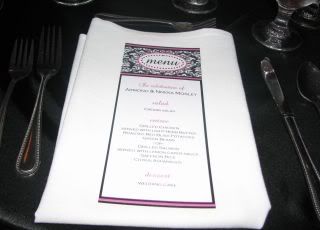
We had our reception at the new Holiday Inn in Colonial Heights, Va and the food was great!! Im happy to say it tasted just as good as it did at the tasting!
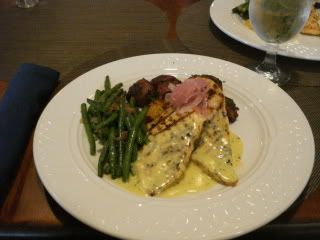
Food Option #1: Grilled Chicken Breast with Herb Butter Sauce, Red Bliss Potoates, & Green Beans
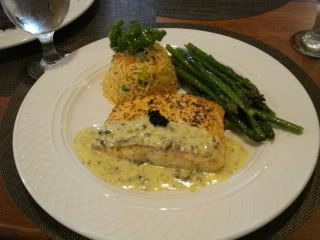
Food Option #2: Grilled Salmon with Lemon Caper Sauce, Saffron Rice, & Citrus Asparagus
Of course I had a few different designs I was going to go with before making a final decision. This was one of the menu designs I initially came up with:

And this is the final menu design I went with:


We had our reception at the new Holiday Inn in Colonial Heights, Va and the food was great!! Im happy to say it tasted just as good as it did at the tasting!
Food Option #1: Grilled Chicken Breast with Herb Butter Sauce, Red Bliss Potoates, & Green Beans

Food Option #2: Grilled Salmon with Lemon Caper Sauce, Saffron Rice, & Citrus Asparagus

Wednesday, November 11, 2009
My DIY Wedding Reception Centerpieces
When I started planning my wedding, I had no idea I would spend so much time trying to determine what look I wanted to go for with the reception centerpieces. Ideally, I would have loved massive pink floral centerpieces draped in rhinestones or something elaborate like that... but those cost serious dough!!
So now the dilemma was ...how do I come up with something cost effective that looks elegant and classy but not cheap?? Although, I couldn't have my dream floral arrangements, I still wanted to incorporate flowers in the centerpieces and I knew I wanted to make use of candles too. Sooo in my quest to come up with something... I had quite a few ideas over the course of planning. I took a few pics of some of my ideas....shall we take a look (lol)....
Idea #1 - Ive always loved the way flowers submerged in water look..so I came up with this:
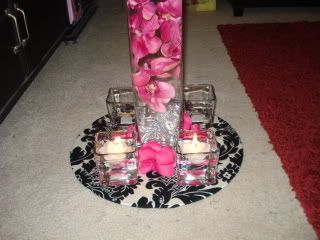
(Purchased tall vase from Michaels and square vases from Dollar Tree)
Idea #2 - The inspiration for this idea came from a picture I saw in a wedding mag:
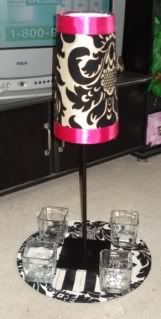
(Purchased lamps from Ikea for $5 and covered them in fabric and ribbon)
Idea #3 - Still the lamp idea but decided to try out contrasting patterns
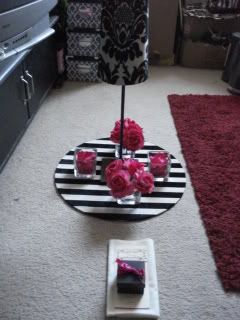
I decided to nix the lamp idea because something was off about it and bases of lamps looked a little cheesy to me.
Idea #4 - This look wasn't far off from what I ended up going with
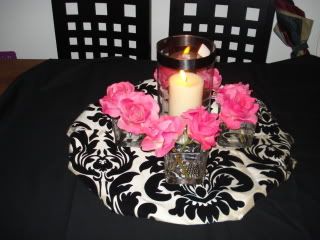
Idea #5 - This was a mockup of the look I decided to go for.
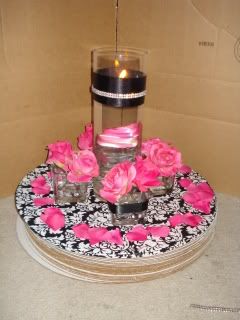
BLOGGER TIP: Try to do mockups of all the ideas you come up with. The last thing you want to do is see how the idea you came up with in your head looks in real life for the first time on your wedding day!
The vases I used were 5X15 and we used floating candles instead of pillar candles. Using floating candles vs pillar candles is definitely a sure way to save money. Floating candles run from $1.00-$2.00 a piece vs pillar candles can run anywhere from $3.00 to $20 each. I knew I didnt want to just use a plain vase for the centerpieces so I decided to get some ribbon and rhinestones and jazz up the vases a little.
All you need for this project are the vases, ribbon, strings of rhinestones and a hot glue gun.
Here are the rhinestones I used:
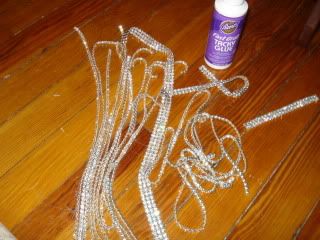
If you are in the NY area, you can get them from B&Q Trim on 210 38th Street. If not, you can order online at www.shinetrim.com
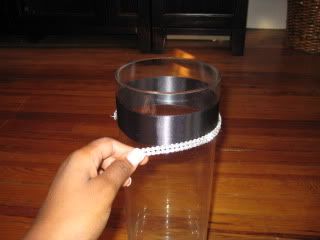
First step is to cut ribbon out and use glue gun to glue it around each vase.
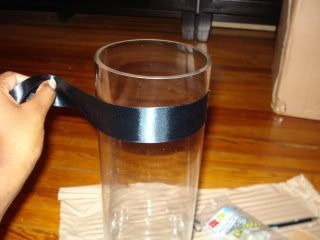
Next, glue rhinestones around ribbon using hot glue gun.
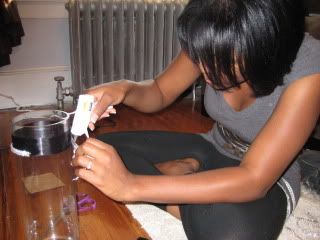
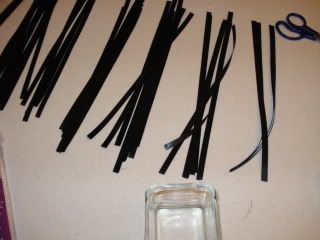
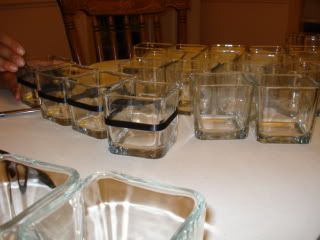
After those were done, it was time to move on to the smaller square vases that were going to hold the roses. I bought them for $1 each at Dollar Tree. FYI, you can buy in bulk online at www.dollartree.com. But again, I didnt want them to be bare, so I decided to glue a thin ribbon around each of those too.
Ribbon cut out in pieces:
Thank God I had help with these (Thanks Katisha :)
So after all that was done, here is how it turned out at reception:
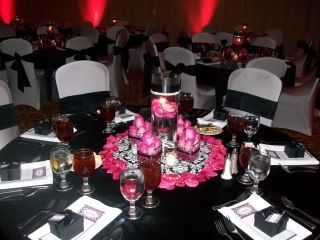
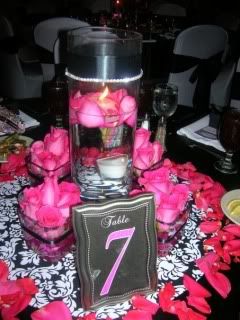
The centerpieces sat on 20 inch cardboard pizza circles that I covered with damask fabric. I got them for $0.95 each at www.epartypaper.com/Cardboard_Pizza_Circles.html
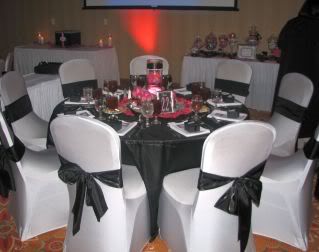
I also used the rhinestones to decorate vases for head table and we used pillar candles in these for more of an impact
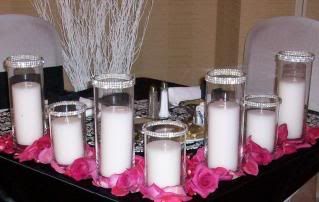
Head Table/Sweetheart Table
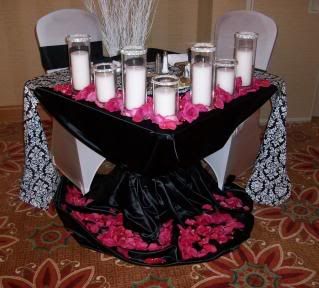
P.S. I bought my vases and pillar candles from Jamali Garden in NY. If you aren't in the NY area, check out their website www.jamaligarden.com
So now the dilemma was ...how do I come up with something cost effective that looks elegant and classy but not cheap?? Although, I couldn't have my dream floral arrangements, I still wanted to incorporate flowers in the centerpieces and I knew I wanted to make use of candles too. Sooo in my quest to come up with something... I had quite a few ideas over the course of planning. I took a few pics of some of my ideas....shall we take a look (lol)....
Idea #1 - Ive always loved the way flowers submerged in water look..so I came up with this:

(Purchased tall vase from Michaels and square vases from Dollar Tree)
Idea #2 - The inspiration for this idea came from a picture I saw in a wedding mag:

(Purchased lamps from Ikea for $5 and covered them in fabric and ribbon)
Idea #3 - Still the lamp idea but decided to try out contrasting patterns

I decided to nix the lamp idea because something was off about it and bases of lamps looked a little cheesy to me.
Idea #4 - This look wasn't far off from what I ended up going with

Idea #5 - This was a mockup of the look I decided to go for.

BLOGGER TIP: Try to do mockups of all the ideas you come up with. The last thing you want to do is see how the idea you came up with in your head looks in real life for the first time on your wedding day!
The vases I used were 5X15 and we used floating candles instead of pillar candles. Using floating candles vs pillar candles is definitely a sure way to save money. Floating candles run from $1.00-$2.00 a piece vs pillar candles can run anywhere from $3.00 to $20 each. I knew I didnt want to just use a plain vase for the centerpieces so I decided to get some ribbon and rhinestones and jazz up the vases a little.
All you need for this project are the vases, ribbon, strings of rhinestones and a hot glue gun.
Here are the rhinestones I used:

If you are in the NY area, you can get them from B&Q Trim on 210 38th Street. If not, you can order online at www.shinetrim.com
First step is to cut ribbon out and use glue gun to glue it around each vase.

Next, glue rhinestones around ribbon using hot glue gun.


After those were done, it was time to move on to the smaller square vases that were going to hold the roses. I bought them for $1 each at Dollar Tree. FYI, you can buy in bulk online at www.dollartree.com. But again, I didnt want them to be bare, so I decided to glue a thin ribbon around each of those too.
Ribbon cut out in pieces:

Thank God I had help with these (Thanks Katisha :)

So after all that was done, here is how it turned out at reception:


The centerpieces sat on 20 inch cardboard pizza circles that I covered with damask fabric. I got them for $0.95 each at www.epartypaper.com/Cardboard_Pizza_Circles.html

I also used the rhinestones to decorate vases for head table and we used pillar candles in these for more of an impact

Head Table/Sweetheart Table

P.S. I bought my vases and pillar candles from Jamali Garden in NY. If you aren't in the NY area, check out their website www.jamaligarden.com
Subscribe to:
Comments (Atom)


